This rather short article explains step by step how to bypass SSL pinning when analyzing an Android application with Frida and Burp.
I invite you to read my article on PixPay for more details on what reverse engineering is.
Prerequisites
- Python 3.11 or higher
- Burp Suite (CE is enough)
- Android Platform Tools (to use the
adbtool) - A rooted Android device
- A cable to connect your phone to your computer
Installing Frida
![]()
Start by creating a virtual environment and installing Frida.
💻 On your computer
Create a virtual environment
python3 -m venv frida
source frida/bin/activate
Install Frida
pip install Frida
pip install objection
pip install frida-tools
📱 On your Android
Now, let’s install Frida on your phone. Make sure USB debugging is enabled, then connect your phone to your computer.
Download Frida Server
Run this command on your computer to get your phone’s architecture.
adb shell getprop ro.product.cpu.abiClick on this link, and select the Frida Server version (not the Platform Kit!) corresponding to your architecture.
Unzip and rename the file
Replace VERSION and ARCH with the values you previously obtained.
xz --decompress frida-server-VERSION-android-ARCH.xz

mv frida-server-VERSION-android-ARCH frida-server
Upload the file to your phone
The following commands allow you to copy the file to your phone and make it executable.
adb push frida-server /data/local/tmp/
adb shell "chmod 777 /data/local/tmp/frida-server"
Run Frida Server
adb shell
su
/data/local/tmp/frida-server &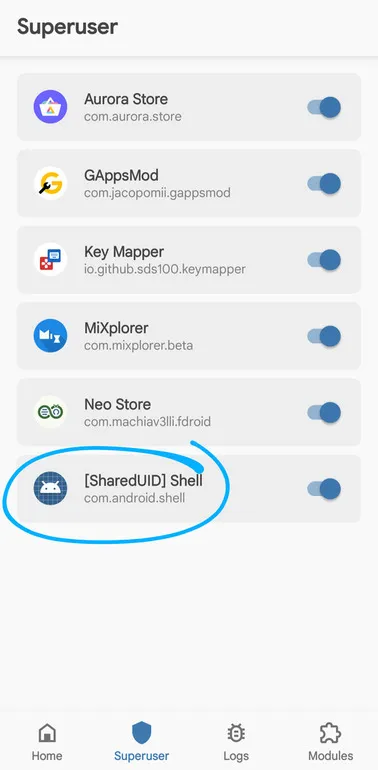
Make sure to grant root permissions to the Shell to run Frida Server.
And there you go!
Now, on your computer, run the following command:
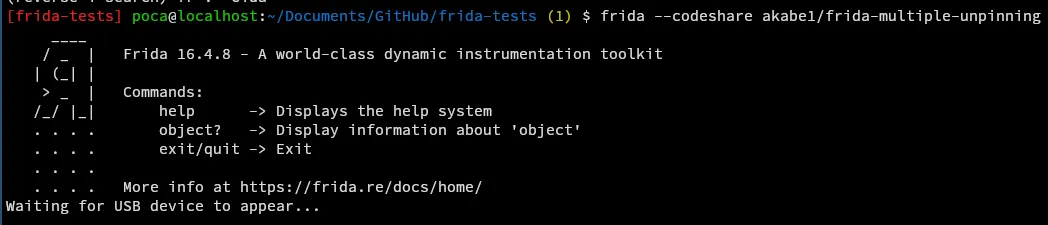
frida --codeshare akabe1/frida-multiple-unpinning -U -f com.yourapp.packageReplace com.yourapp.package with the package of the application you want to analyze.
Burp Suite
Launch Burp Suite and go to the Proxy tab.
Install the Burp certificate
First, you need to export the Burp certificate. To do this, go to Proxy > Options > Import / Export CA Certificate.
Select the DER format and export the certificate (making sure to manually add the .der extension!). Download it to your phone, and from the settings, install it.
Trust the certificate
With a root explorer like MiXplorer, go to one of these two folders:
/data/misc/keychain/cacerts-added/- (or, if the first folder is empty)
/data/misc/user/0/cacerts-added/
Move the file you found in one of the two folders to /system/etc/security/cacerts.
Restart your phone.
Configure the proxy on Burp and Android
To have your phone use Burp as a proxy, go to your phone’s settings, then Network & Internet > Wi-Fi > Modify network > Advanced.
Get your computer’s local IP with the command ip a for example, and enter it in the Proxy field.
For the port, use 8888.

Then go to Burp, and add a Bind Address in the proxy settings (*:8888, select All interfaces).
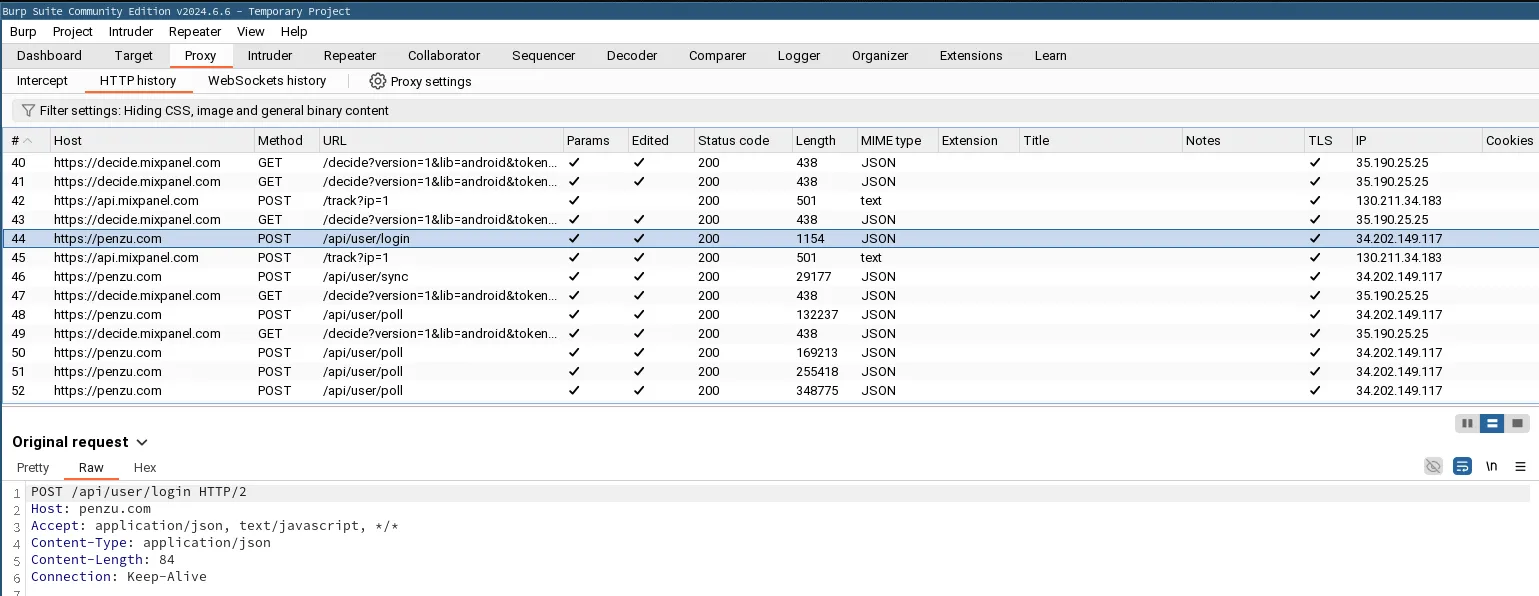
And there you have it!
You should see the requests arriving in clear text in Burp (if not, make sure the interception is enabled).