Hello everyone. In this first post on this blog, I’m going to detail the reverse engineering of the PixPay app, a French neo-bank.
This article serves both as notes in case I have to do this again with another app, and as a tutorial so you can (maybe) learn a few little things!
In this post, I’ll be using Charles Proxy, ProxyDroid, a rooted Android 7.0 (actually a Samsung J3 2016 Android 5.0 with an Android 7.0 ROM) and Frida.
Reverse engineer-what?
Reverse engineering involves studying how an application was designed, often to be able to automate certain actions of the app using code. A small example: if we understand how Instagram works, we can manage to automatically post with a script.
Why did I choose PixPay?
After already doing a bit of reverse engineering with the Pronote app, I wanted to familiarize myself a bit with Charles Proxy and all these tools. Intercepting the app’s requests should have only taken me about an hour, but as you will see, it turned out to be a bit more challenging. I chose PixPay out of curiosity for these “neo-banks” and because it’s one of the only ones that hasn’t already been studied.
Intercepting the requests
Well, now that I’ve chosen the application, PixPay, I need to find a way to understand how it works, and more specifically how its private API works. For example, to register, maybe you need to send a request to https://api.pixpay.fr/auth/register with a phone number and password as parameters. The problem is, I can’t test all imaginable requests (/auth/register, /register, /appregister…) by testing with different names in the forms. It would take way too long and likely be unsuccessful.
For this, the simplest way is to launch the application on your phone and connect your phone to a proxy server (here my computer), which will intercept all requests leaving the phone. Here’s a little diagram:

Since all requests between the app and the API are intercepted, this will allow me to find all the API URLs (endpoints) by simply navigating through the app.
Launching Charles Proxy
For this, I decided to use Charles Proxy, a software that allows us to launch a proxy server on a computer to connect my phone with it. There are numerous tutorials on Google, but in summary:
- download Charles from https://www.charlesproxy.com/ (many cracks are available, otherwise $20 for life)
- launch Charles
- in your phone’s Wifi settings, configure a proxy with the local IP address of your computer as
hostand8888as the port - in Charles settings > SSL Proxying, add a domain
*. - open a browser and type
https://chls.pro/sslto download the Charles SSL certificate and then install it on your phone (by clicking on the downloaded file)
Once Charles and your phone are set up, you can try to perform a Google search, which will appear in Charles.

Flutter, the Android framework that doesn’t follow Android settings
There we go, now I should be able to launch PixPay and see the requests! Except… no. I launch PixPay and no requests to the API show up. No error, nothing is displayed in Charles. The answer, which I found after a while: PixPay uses Flutter, a development framework for Android apps (which I have actually used for my app Notifications pour Pronote). And this framework doesn’t use the proxy configured in the phone’s Wifi settings. Great.
Forcing the use of our proxy
To overcome this issue, I used ProxyDroid. It’s an application that allows you to force the use of a proxy on the phone. Obviously, this app needs root to work. A week later, I retrieve an old Samsung S4 Mini (Android 4) that I had rooted. I try to install with ADB, and… it doesn’t work. The app requires Android 5 to function. So I retrieve an old Samsung J3 2016. All that’s left is to root it… I’ll spare you the details, but after a few hours spent on a call with @kaki87, whom I thank immensely again, my J3 is rooted with Magisk and XPosed (and a custom ROM, resurrection remix, on Android 7).
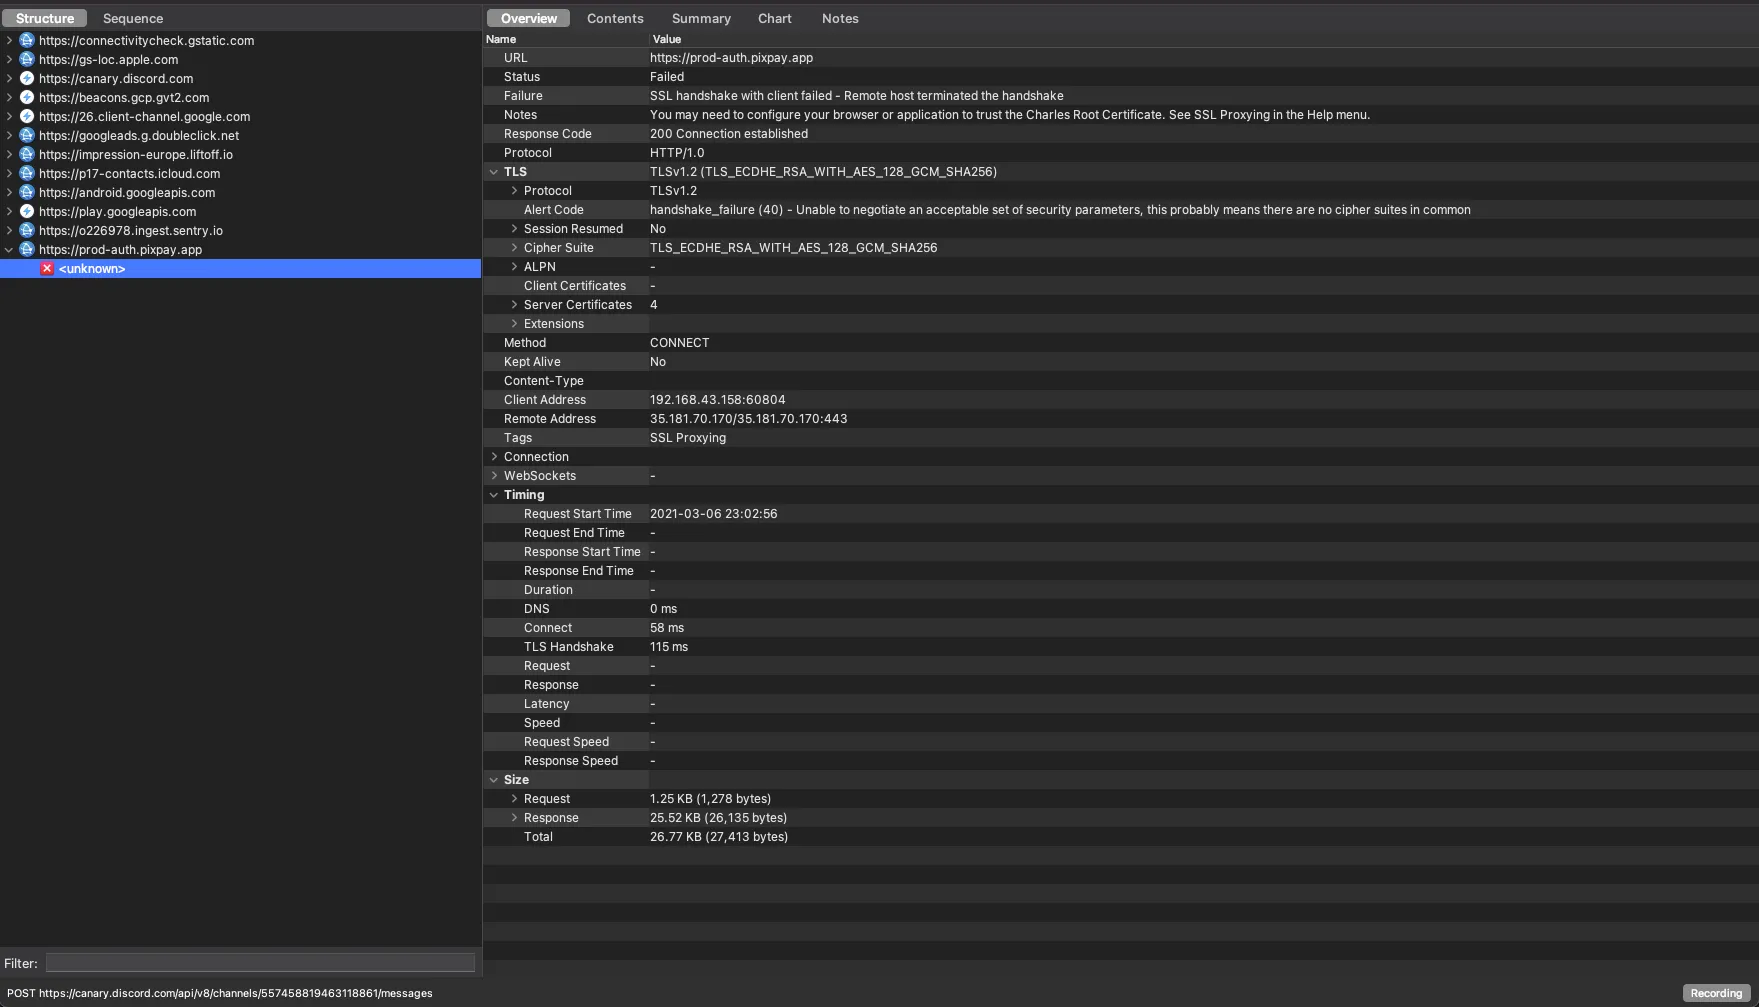
SSL handshake failed.
Okay, let’s relaunch PixPay now. And it still doesn’t work. “SSL handshake failed” in Charles.
System certificate
I first tried moving the Charles certificate from user certificates to system certificates, but Flutter… doesn’t even trust system certificates. 🙂
SSL Pinning
In summary, the app uses a type of protection called SSL Pinning. For the curious, Micode explains very well what this is in his video. To bypass this protection, we have 3 solutions:
- “decompile” the APK to extract the smali files and find the SSL pin to replace it with Charles’
- use an XPosed module like JustTrustMe or TrustMeAlready
- use Frida
After trying 4-5 Magisk plugins, it’s clear that these “universal” Magisk plugins won’t work with PixPay. I also tried decompiling the APK, but couldn’t find an SSL pin (though it might be possible).
I then came across a very good article that uses Frida. To install Frida:
- if you have Magisk, there is MagiskFrida which automatically installs it for you
- otherwise, follow this tutorial
I create the file frida.js:
function hook_ssl_verify_result(address){
  Interceptor.attach(address, {
    onEnter: function(args) {
      console.log("Disabling SSL validation")
    },
    onLeave: function(retval) {
      console.log("Retval: " + retval)
      retval.replace(0x1);
    }
  })
}

function disablePinning(){
  const m = Process.findModuleByName("libflutter.so")
  const pattern = "2d e9 f0 4f a3 b0 82 46 50 20 10 70"
  const res = Memory.scan(m.base, m.size, pattern, {
    onMatch: function(address, size){
      console.log('[+] ssl_verify_result found at: ' + address.toString())
      hook_ssl_verify_result(address.add(0x01))
    },
    onError: function(reason){
      console.log('[!] There was an error scanning memory')
    },
    onComplete: function(){
        console.log("All done")
    }
  })
}

setTimeout(disablePinning, 1000)
This script is very interesting, I invite you to read this to understand how it works.
I then run frida -U -f fr.pixpay -l frida.js --no-pause, launch PixPay and then…

It works. I now have access to all the requests leaving PixPay for its API!
We have a first request for logging in to https://prod-auth.pixpay.app/auth/login. This request, if successful, returns a token.
All other requests work with GraphQL and the endpoint https://prod-bo1.pixpay.app/graphql, authenticated with the previously retrieved token.
Creating a JavaScript library
All that’s left is to create an account, put a few euros on it, and create a small JS library for fun by implementing the main endpoints. The final library is available on GitHub!
Thank you for reading this far, and I hope this post helped you learn a bit more about reverse engineering, especially of Flutter applications! I also thank Kaki87 again for their help and the author of the Frida script, Jeroen Beckers.